How to record EVERYTHING

In the years of building this website and dealing with people’s microphone questions, as well as being an aspiring musician and helping friends record their own stuff, I’ve learned quite a lot on how to record stuff on a budget. This knowledge is what I’m planning to share with you here today, in this first chapter in a series of blog posts.
Disclaimer: The product links in this guide lead to Amazon, and if you click on the link and then buy something, I earn a small fee. All the recommendations in this guide are real and come from my experience and honest opinion.
Recording at Home and on A Budget
Few industries have been revolutionized by technology quite like the recording industry has in the last few years. Around the turn of the millennium, recording music typically entailed hiring an engineer and producer to lay down your tracks. You’d shell out several hundred dollars, (or more) spend the day in a studio that resembled a NASA control room, and a few weeks later, you’d have your recording back.
While the professional recording studio definitely still has its place, recording at home is light years ahead of where it once was, and these days it’s quite simple to record virtually anything from the comfort of your bedroom quickly, affordably, and with good quality.
Today, we’re going to take a deep dive into what you need to know before you start recording. From there, we’ll cover how you can go about recording EVERYTHING: from a band to a French horn to a podcast.
Types of Mics Explained
Before we can dive in and get to recording, we’ll need a quick crash course in microphones. Why? Because microphones are the single most crucial element of the recording process, and they will make all the difference between a clear, clean and professional sounding recording and a poor recording nobody will enjoy listening to.
For our purposes, there are a whopping nine different types of microphones:
- Dynamic
- Large diaphragm condenser
- Small diaphragm condenser
- Ribbon
- Bass
- USB
- Multi-pattern
- Boundary
- Shotgun
Condenser vs. Dynamic
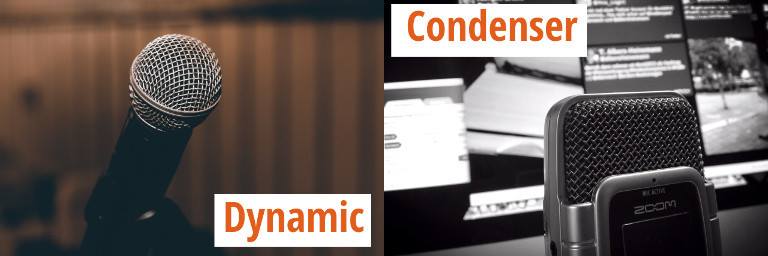
Both condenser microphones and dynamic microphones accomplish the same general goal. They both turn the sound that’s being generated into an electronic signal. For our purposes, that signal is then processed by the recording software being used, which provides us with an audio track that we can manipulate. However, the way that condenser and dynamic microphones convert sound into an electric signal is entirely different. Read on for a rather technical explanation of how it works.
***Technical Explanation Begins***
Condenser microphones consist of two parts: a diaphragm and a backplate. The backplate is mounted beneath the diaphragm, and these two parts form something called a capacitor (also known as a condenser) which is sensitive to sound.
The capacitor can store a charge or voltage, which creates an electrical field in between the diaphragm and the backplate.
Here’s where it gets interesting: The electrical field that’s created is proportional to the distance between the diaphragm and the backplate. The instrument that’s being recorded produces sound waves which cause the diaphragm of the microphone to vibrate. This vibration changes the distance between the diaphragm and the backplate, which is how the sound waves are processed into an electrical signal by the microphone.
A condenser microphone requires a power source so that it can maintain its electrical charge. There are two different types of condenser microphones, and they’re designated by how the microphone receives power.
An electret condenser microphone maintains its charge permanently, thanks to a special material that’s added to the backplate or diaphragm of the microphone.
A non-electret condenser microphone has no means of maintaining a charge on its own and uses an external power source.
***Technical Explanation Ends***
In general, condenser microphones are expensive, sensitive and delicate. But, they do offer serious advantages over dynamic mics for certain types of recording. For this reason, they’re favored for most recording applications including vocals, podcasts, and live concerts where the highest level of sound quality is important (think the New York Philharmonic, for example).
On the other hand, the delicate nature of condenser microphones means that they have a maximum decibel rating. If the sound being generated is louder than the maximum decibel rating for the microphone, it won’t function properly. For this reason, condensers aren’t a good choice for recording extremely loud sounds, like a rock concert, for example
That brings us to dynamic microphones, which thankfully are a bit easier to understand than condenser microphones are.
***Technical Explanation Begins***
Dynamic mics have a three-part assembly which creates a sound sensitive electrical generator inside the microphone. First, you have the diaphragm. Attached to the diaphragm is the second part of the assembly, which is a thin coil of wire known as a voice coil. Finally, a magnet is inserted under the diaphragm where it’s surrounded by the voice coil.
Similar to a condenser microphone, sound waves vibrate against the microphone’s diaphragm. The voice coil vibrates along with the diaphragm in response to the sound waves. The magnet that’s surrounded by the voice coil forms a tiny magnetic field, and the vibration of the voice coil within that magnetic field is what allows the microphone to convert the sound waves into electrical energy.
***Technical Explanation Ends***
Thanks to their simplicity, dynamic mics are often much more affordable than condenser mics. They’re also more durable, and since they can handle virtually any signal volume without issue, they’re favored for recording in very loud environments.
Pickup Patterns: Cardioid vs. Figure-8 vs. Omnidirectional
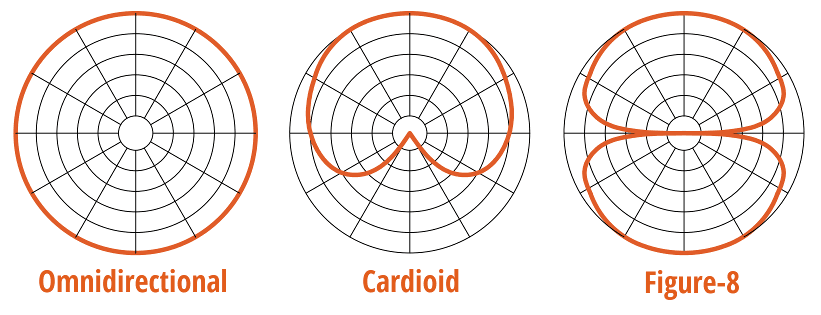
Now that we understand the two major types of microphones, we’re going to take a look at how they pick up sound. The pickup pattern of a microphone dictates which applications it’s going to be best for, as well as applications for which it should be avoided.
The pickup pattern of a microphone refers to the directionality of sound it picks up. It may seem like a strange thing to be concerned with at first, but once you begin to learn the ropes, the importance of pickup patterns will become clearer to you.
Cardioid microphones are also known as unidirectional mics. These microphones pick up the sound that’s directly in front of them, as well as a small amount of noise coming in from the sides. They almost entirely reject any sound that’s coming from the rear of the microphone.
This pickup pattern is extremely popular for many recording applications, as well as live performance.
This pickup pattern is extremely popular for many recording applications, as well as live performance.
There are also some variations of the traditional cardioid pickup pattern. These patterns are called wide-cardioid, supercardioid and hypercardioid.
Wide-cardioid microphones are slightly less unidirectional than a traditional cardioid mic, and they pick up some sound coming from the sides and rear of the microphone. These mics are a popular choice for recording acoustic guitar and vocal ensembles.
Supercardioid and hypercardioid mics reject sound from the sides but allow some sound from the rear of the microphone to leak into the recording as well. Supercardioid mics are another popular choice for live recordings, as they allow a bit of crowd noise to bleed into the recording.
Hypercardioid mics reject even more sound from the rear and almost exclusively pick up sound from the front. The most popular applications for these microphones are recording live drums.
Figure-8 microphones are also known as bi-directional mics. Their name comes from the fact that they pick up sound in a figure 8 pattern. Noise coming in from the sides of the microphone is strongly rejected, while the front and rear of the microphone pick up practically everything.
These types of microphones are popular for recording interviews where two people are talking, and they’re also used for some advanced stereo recording techniques. Chances are, you won’t have much use for a microphone with a figure-8 pattern, at least in the beginning of your journey as an audio engineer.
Omnidirectional mics pick up all the sound that’s around them, regardless of directionality. These microphones are a staple of home studios everywhere, and they do a great job at picking up the main source of sound in addition to some of the surrounding ambient room noise.
This makes these mics a popular choice for recording drums with a single mic, as well as recording acoustic guitar, or backing vocals. There are certain applications that omnidirectional mics aren’t suited for, but they’re extremely useful where they fit.
Simple Home Soundproofing and Why You Must Have It
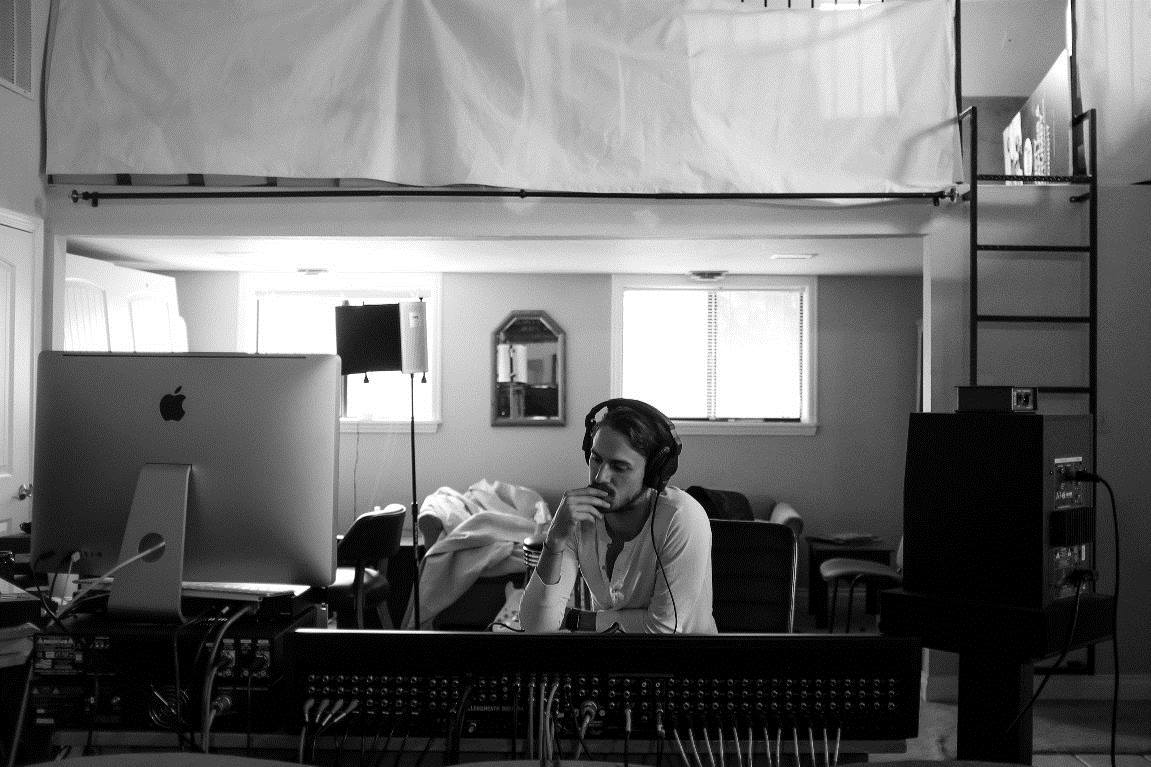
“Soundproofing” is actually two things: how does sound travel within the room, and whether outside noises travel into the room . It also means sound leak from the room to the outside (and into your neighbours’ ears) – but because this isn’t imperative to the quality of your recording unless the neighbour comes banging on the door and screaming in the middle of your recording – we won’t talk about that aspect here.
Neutralizing outside sounds can be an expensive affair. I’ve tried eliminating outside sounds in several ways, and the results were never highly satisfactory. In my eyes your best bet here is to simply record in a room and at a time of day that are relatively quiet… and just hit record again if any strong sounds crept in during the recording.
Indeed, the more crucial element here is the treatment of the sound within the room. From the moment you’ll start recording something in an untreated closed space you will notice that the sound isn’t great, whether you were using a $50 microphone or a $2000 one. And that, my recording friends, is because of reverberation. The sound your voice or instrument is projecting is being rebated from the walls, the floor, the ceiling – and thus getting you less than stellar results.
That’s why some simple soundproofing or sound treatment can really improve your sound to a great extent. Professional soundproofing measures deal with concepts such as Damping, adding mass, Decoupling, and filling air gaps. But we’re gonna go with something simpler, cheaper, but nonetheless effective: blankets! A few blankets hung around the walls would absorb the echoes and reverberations. Egg cartons? I have found those to be less effective, but your mileage may vary.
Another simple and important concept to keep in mind here is that the closer you are to a wall, the more reverberations you’re getting. So position yourself or the thing that you’re recording in the middle of the room, and choose a larger room rather than a small one. Indeed, a very small and untreated room would prove to be almost impossible to get good recordings in.
How to Record Musical Instruments
Now that we have a much better understanding of how microphones work and the different microphones that are best for different types of recording, it’s time to examine exactly how to record different musical instruments.
Unfortunately, it’s far from being as simple as just placing a microphone in front of an instrument and recording what comes out. But, the tips below will provide you with the framework you need to create crisp, clean recordings in every possible situation.
Brass
We’ll jump right into one of the more difficult instruments for DIY engineers to record effectively. Unlike most instruments, which will sound similarly in most different environments, brass instruments are highly influenced by the room that they’re being played in.
For this reason, it can be difficult to achieve a quality, natural brass sound in a room that hasn’t been acoustically treated for recording. But, with some practice, you’ll learn to get a great brass recording in most environments.
Since many brass instruments tend to have a certain shrill-ness to their sound (especially when it comes to trumpets) my favorite microphone to use is a ribbon microphone. Ribbon microphones have a figure-8 pickup pattern by default, and they tend to produce the most natural and full brass sound on record.
My go-to ribbon mic for recording brass is the MXL R144. This is a mic you’ll be able to add to your arsenal for under $100. Not every home recorder has a ribbon microphone at their disposal. I purchased my first ribbon mic just a couple of years ago, and before that, I’d use a dynamic microphone to record brass instruments – which did the job.
While a dynamic mic will add a bit more color to the sound of your recording than a ribbon mic will, you can still get a great sound with a dynamic mic, and chances are you already have a capable tool for the job.
Once you’ve selected your microphone, you’ll want to experiment a bit with instrument and mic placement. Start by placing your mic 3-6 feet away from the bell of the instrument. Brass instruments tend to sound their best when the mic used for recording is a bit off axis, so start by placing the mic 30-45 degrees off axis for your first few takes.
If you’re not happy with the sound you’re getting, do some more experimentation. Have the horn player face a different direction, tinker with the orientation and height of the microphone, etc.
Woodwinds
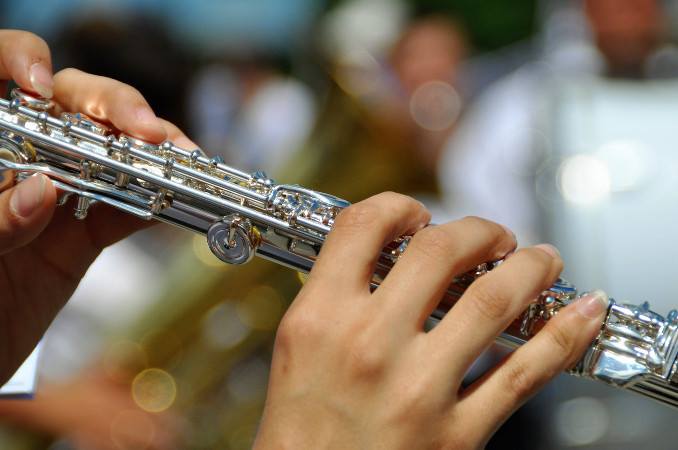
Perhaps the only class of instrument that presents more unique hurdles and difficulties than brass instruments are the woodwinds. Woodwind instruments generate sound from the bell, as well as from the valves along the body of the instrument – a fact which makes their sound harder to capture to its fullest. Plus, the different instruments in the woodwind family vary widely in their designs and how they create sound.
This all translates to a class of instruments that require tons of trial and error on behalf of the engineer to achieve a crisp and natural recording.
Fortunately, you should be able to capture a quality sound with a single cardioid condenser mic. Ribbon mics and even dynamic mics can also do the trick, but I find myself reaching for a cardioid condenser for woodwind applications every time. In particular, my favorite for this application is the Audio Technica AT2035.
Where things get interesting is mic placement. For most woodwind instruments, try placing the microphone about 14” above the player’s bottom hand, on-axis. Treat this as your starting point and start experimenting.
You may find that this configuration immediately produces the results you’re going for. But, if you’re unhappy with the results, try moving the microphone closer or further away from the instrument’s mouthpiece, and closer or further away from the instrument in general.
Stringed
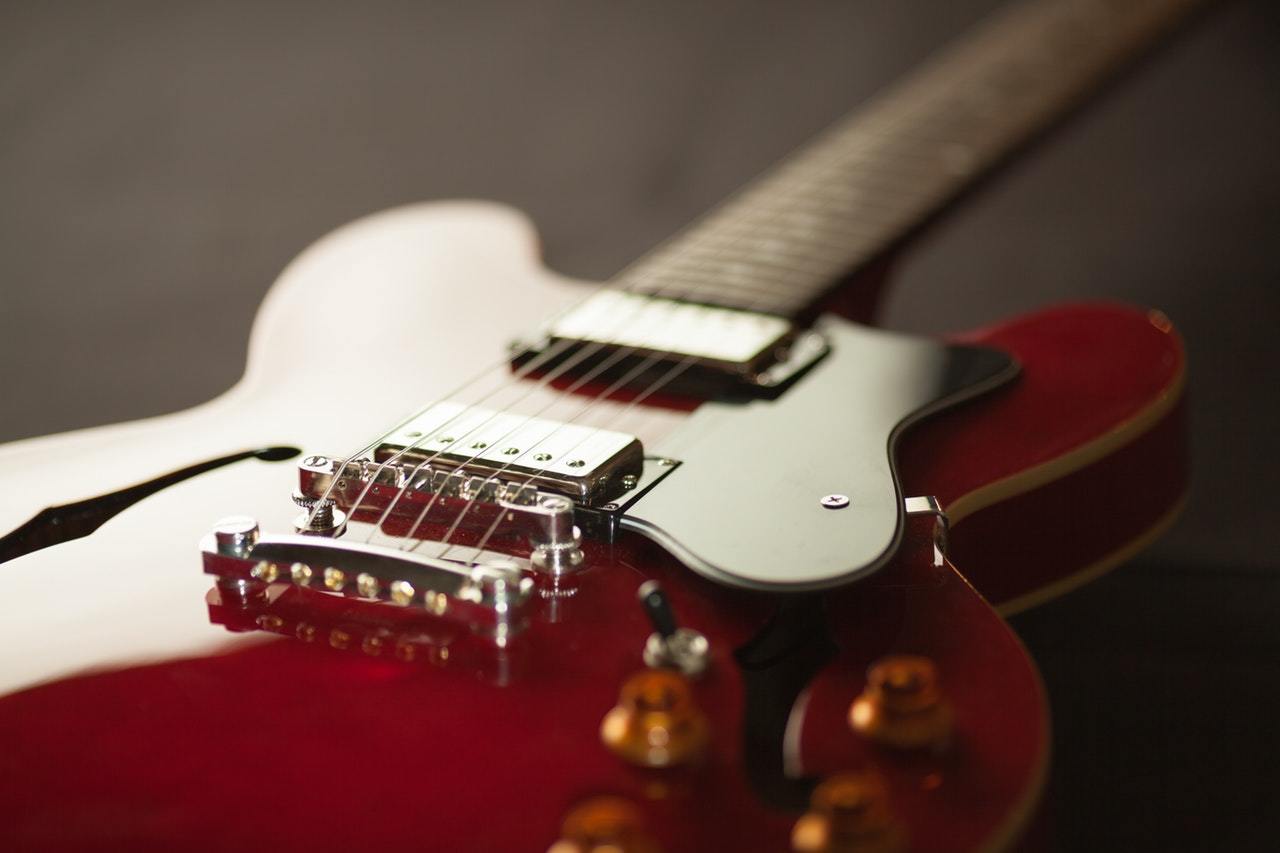
Perhaps the most widely recorded instrument family, (thanks to the guitar) the string family presents its own unique set of challenges. Fortunately, it’s usually quite easy to achieve a full and rich string sound on a recording.
When recording classical stringed instruments, like the cello, violin or viola, you’ll be able to employ fairly similar techniques to achieve an excellent sound with a single microphone.
You’ll want to grab for a cardioid condenser for this project (small diaphragm, if possible.) Position the mic about 3-4 feet away from the player and about a foot above the instrument at a 45-degree angle.
Since it’s already in my repertoire, I reach for the AT2035 small diaphragm condenser, which has a particularly great sound for cellos and bass. It also serves well enough for the treble instruments, the violin and viola.
You’ll want to experiment with the exact area of the instrument you’re pointing your microphone towards. Start by positioning the mic in between the sound hole and the strings of the instrument near where the body meets the neck. You can experiment further from there to dial in your sound.
Electric Guitar
When it comes to recording, few instruments are quite as versatile as the electric guitar. Not only can you record the amplifier, but you also have the option to plug the guitar directly into your interface and record the raw signal.
While recording the guitar direct is a great way to lay down a track in a pinch, most engineers agree that you simply can’t achieve the type of tone you’re aiming for with amp emulators. For that reason, micing the amplifier remains the industry standard method of recording electric guitar.
The tried and true method for recording electric guitar is affordable and nearly impossible to screw up. I, along with a large portion of the industry rely on the Shure SM57 dynamic cardioid mic to record electric guitar.
The SM57 is a microphone that every aspiring engineer needs in their arsenal. In fact, you’ll probably want to have more than one handy at all times. When it comes to recording rock instruments like electric guitar, bass, and drums, the SM57 is the tried-and-true weapon of choice.
Placing the mic is practically foolproof. Place your mic halfway between the cone of the speaker and the outer edge, with about a half inch of space between the amp’s grill and the face of the microphone. You’re done.
Of course, you’ll be able to achieve many different tones by moving the placement of the microphone or trying different dynamic mics. But, the method above will yield great results in a matter of second. If your recording sounds bass heavy, try moving the microphone further away from the speaker slightly. If the recording lacks bass, try moving it a bit closer.
Classical Guitar
Recording classical guitar is also a fairly straightforward task, thanks to the simple design of acoustic guitars.
The majority of the sound that’s generated by a classical guitar comes from the soundhole, and to a lesser extent, the body of the guitar. So, recording a classical acoustic is as simple as positioning your mic about 8-12” away from the soundhole of the guitar.
Ideally, you’ll be recording classical guitar with a condenser microphone. If you have one, a small diaphragm condenser mic will be your best option. I use an AKG P170 for classical acoustics, which is affordable and does an excellent job capturing the fine details in the instrument’s sound.
You can also achieve good results with a larger diaphragm condenser, so you don’t necessarily need to run out to buy a new microphone if you don’t already have a small diaphragm option. You’ll want to steer clear of dynamic microphones for this project.
Acoustic Guitar
Some of the principles for recording a classical acoustic carry over to steel-stringed acoustics as well. However, mic positioning and the type of mic you’ll be using are going to differ significantly.
With classical guitar, the sound of the instrument is much more delicate, and as such, it’s treated similarly to other orchestral instruments, recording-wise. With a steel string acoustic, you’re dealing with less subtlety and more attitude, so mic selection differs a bit.
You’ll still want to use a condenser for recording acoustic guitar most of the time. Since a bit more color is probably a good thing in the case of the acoustic guitar, large diaphragm condensers make a fine choice. A small diaphragm condenser will reveal more of the guitar’s true sound, which may be a bad thing if you’re not recording a great guitar to start with.
As a starting position, try positioning your mic in front of the neck of the guitar, right around the 12th fret area, where the body meets the neck. This will allow you to capture the high-end frequencies of the guitar as well. Positioning the mic too close to the soundhole will usually result in too much bass.
Percussion
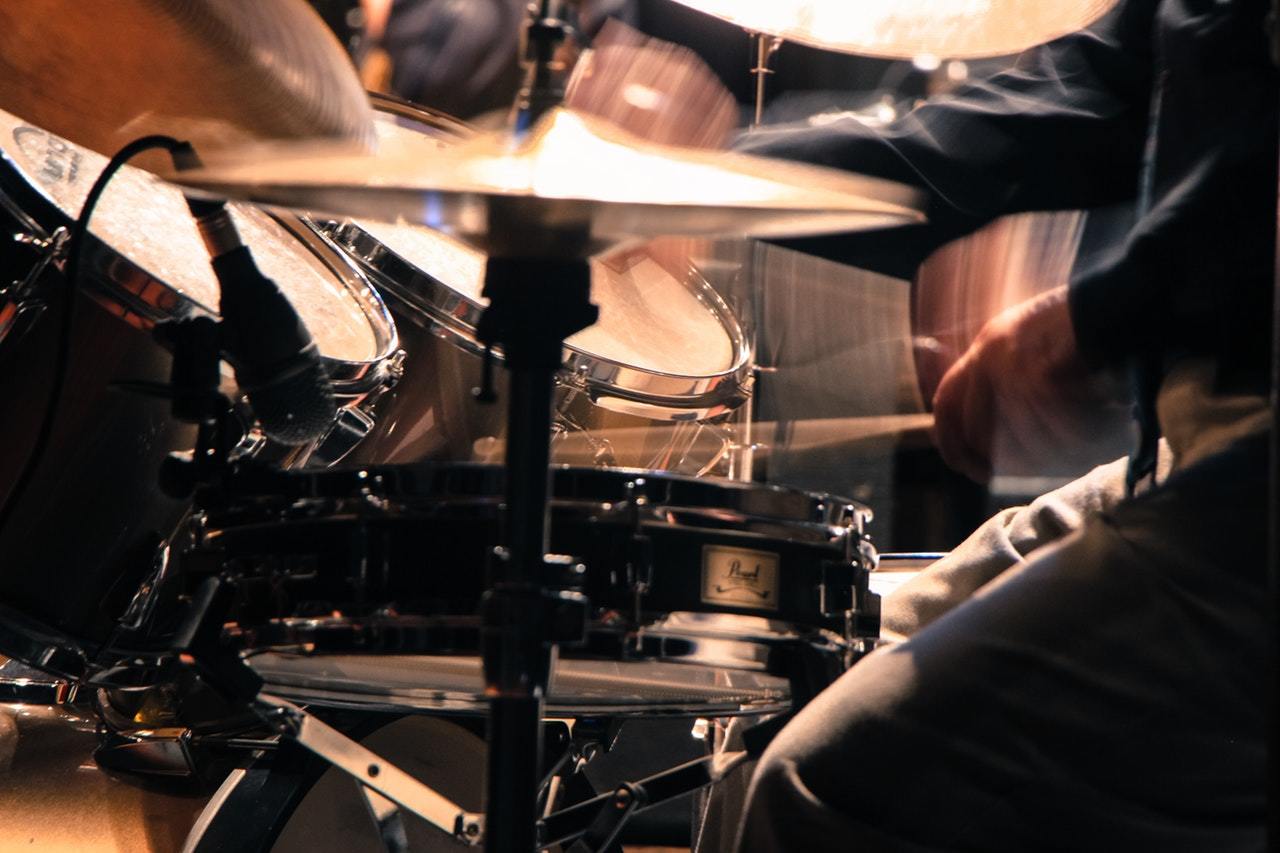
Recording percussion is a straightforward process, but the more microphones you’re using (as would be the case with a full drum kit) it becomes a bit more layered and difficult. Let’s take a closer look at how to record an entire kit, as well as the two most popular aspects of a drum kit, the kick and snare drums.
A Drum Kit
Recording a complete drum kit at once can be a difficult process that requires several microphones in order to capture the sound of each drum. While you can achieve a fairly decent recording with a single microphone, you won’t be able to mix the drums individually once they’ve been recorded.
For the toms, engineers usually rely on low-profile dynamic microphones which clip onto the shell of each tom. These mics should have a cardioid pattern to limit the amount of bleed from other aspects of the drum kit. Cardioid dynamic mics are also used overhead to capture the sound of the crash cymbals. We’ll cover micing the bass drum and snare drum in their own separate sections below.
Some engineers also add dynamic cardioid microphones to the hi-hat and ride cymbal as well.
Capturing the sound of the room is also a critical component to a good recorded drum sound. Many engineers rely on a ribbon mic, like the MXL R144 to capture the sound of the room when recording drum kit.
Since micing a drum kit involves many different mics, you may want to consider an inexpensive drum mic kit like the Samson DK105 Kit.
You may still be able to capture a quality drum recording using just a single omnidirectional microphone, like the AKG P120 large diaphragm condenser.
Microphone placement is something you’ll need to experiment with. Many engineers prefer to record with the microphone 4-6 feet overhead, directly over the snare drum. This allows the snare drum to cut through the mix a bit more. Other engineers prefer to place the microphone about 4-6 feet in front of the kit, and a foot or two off the ground. This tends to provide more of the bass drum sound. Through experimentation, you’ll be able to find a micing technique that works for the sound you’re looking to achieve.
Kick Drum
Capturing a great kick drum sound is fairly easy, provided you have the right mic for the job. While you might not get much use out of it outside of recording drums, you’ll need to invest in a kick drum mic to produce an accurate recording.
Kick drum mics are most often wide diaphragm dynamic mics. They do a great job of capturing accurate bass tones, and they’re you’re best option for recording kick drums.
The mic I use for recording bass drum tracks is a standard in the industry, the AKG D112. This mic is relatively affordable, but if you don’t think you’ll get much use out of the mic, you may want to opt for a cheaper option, or try and borrow one from a buddy.
Mic placement with kick drums is part art, part science, and it can be a lot of fun to tinker with. Taking the front head off the drum can be helpful, especially if you’re tinkering with different mic placements to find the sound you like best.
You’ll be able to achieve different sounds based on where you position the mic inside the drum. Moving the mic closer to the batter head of the drum will provide you with more of the “slap” of the beater hitting the drum. Positioning it farther away will provide you with a bit of a rounder tone with a less pronounced slap.
Also, you’ll notice that the sound you’re recording is different depending on whether you position the microphone on or off-axis from the beater.
Depending on the sound you’re looking to achieve, chances are you’ll be able to find an acceptable tone for you just by altering how you position the mic.
Snare Drum
Compared to the bass drum, micing a snare is a bit more straightforward.
As for microphone selection, hopefully, you’ll be able to reach into the equipment you already have for this project. There’s plenty of specialty mics available that are great for snare drum, but the trusty Shure SM57 makes a fine choice as well. It’s still my go-to snare drum mic, and if you already own one, there’s no need to run out and purchase a new one.
There are a few different schools of thought when it comes to placement. Some engineers swear by micing both the batter head (top) and resonant head (bottom) of a snare drum to achieve the sound they’re looking for.
Start by micing the batter head of the snare since you can always experiment with different sounds later on. Start by positioning the mic at a 30-degree angle, about an inch away from the drum head. Experimenting with the angle of the mic will produce different tones.
If you’re recording a full drum kit, and you’re having issues with mic bleed in your mix, you may want to consider investing in a mic with a super or hypercardioid pattern, as they should be able to capture your sound more effectively, while reducing bleed from other drums.
The Keyboard Family
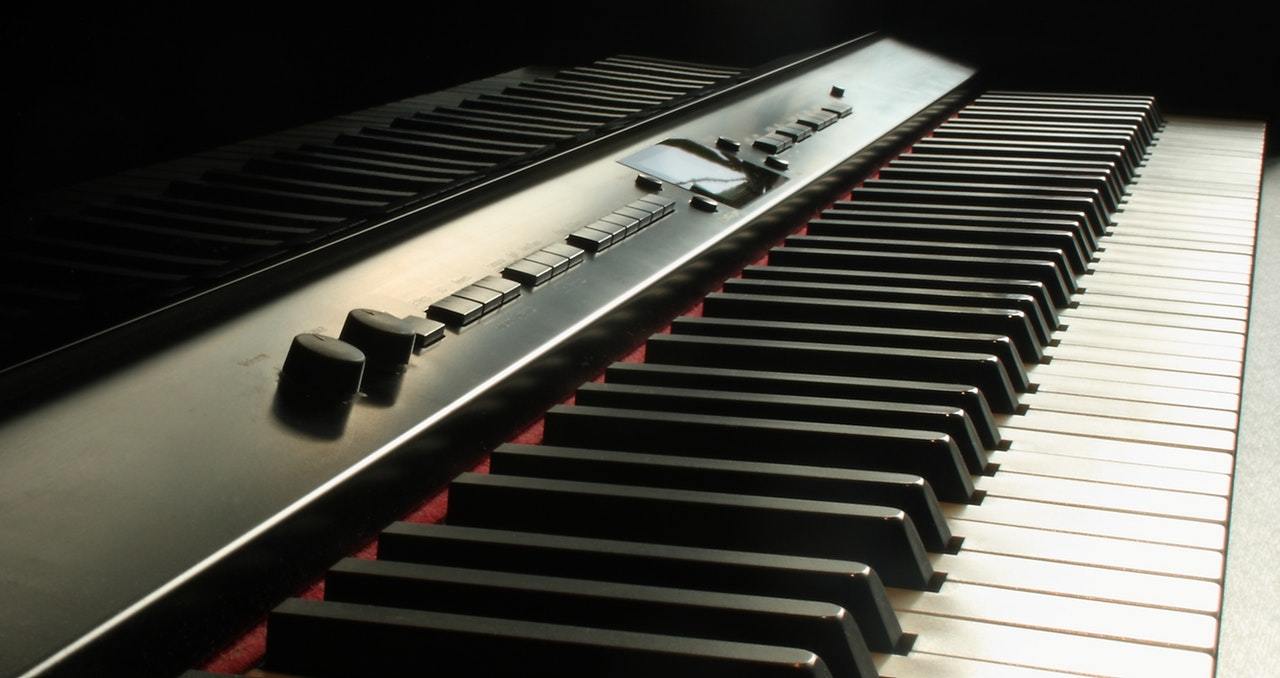
Keyboard
Recording a keyboard is fairly easy and straightforward. Most engineers choose to plug the keyboard directly into their recording interface, using the MIDI out or line out jacks.
But, you can also record keys similarly to the way you’d record the electric guitar: with a keyboard amplifier and microphone.
Recording a keyboard amp is best accomplished with either a dynamic mic or a condenser. The sound you’re aiming for will dictate which mic is best to use. I find that for most projects, my trusty Shure SM57 is more than up to the task.
But, if the keyboard parts you’re recording are particularly rich in high-end frequencies, and the keyboardist is playing many notes in the upper register of the keyboard, you may find that a condenser is better suited for the job.
As for mic placement, you’ll apply the same principals you learned from micing a guitar amplifier.
Organ
Unlike recording the keyboard, the organ presents an array of different challenges which make it a bit more of an advanced project.
In a traditional recording studio, the engineer is likely to use at least 2 (but probably 3) microphones to capture the organ’s sound. Organs get their unique sound from a rotary speaker cabinet, where two separate rotors are constantly spinning to produce sound.
Engineers like to mic the top rotor in the cabinet with one or two dynamic mics, pointed at a 90-degree angle to the rotor. These top rotors handle the treble sound of the instrument, while the bottom rotor handles the bass. Engineers typically use a condenser mic to record the sound of the bass rotor.
It takes a lot of work, and some trial and error to get a great organ sound. Many aspiring engineers prefer to forgo all that work for a later day, in search of a simpler option, and I’m one of them.
Whenever I’ve had to record an organ, I rely on the simple, easy to use Zoom H2 digital recorder. Using the H2 couldn’t be easier: Turn it on, place it, and press record. You’ll want to experiment with different placement to capture the sound to the best of your ability.
Piano
Fortunately, the piano is a bit easier to track than an organ is. But, the complex nature of the piano means it still takes a bit of work to produce the crisp and bright piano sound you’re looking for.
When I’m recording piano, I reach for my Audio Technica AT2035 condenser mic. It does a great job of capturing the subtlety of the piano, and you’re able to achieve wildly different tones depending on how you position the microphone.
I tend to lift the lid of the piano and place the condenser just outside the piano, about 12” above the strings. Positioning your mic further inside the piano will yield a brighter tone while positioning the mic further away from the piano will give you a bit more of the room sound.
Vocals

Recording vocals is one of the most nuanced and involved recording processes there are. Many engineers like to keep a cage of different dynamic and condenser microphones at the ready to capture the essence of different singers.
You can spend hours dialing in the perfect vocal tone for a particular singer, but we’ll cover the basics to get you started, whether you’re recording a singer, an interview or podcast.
Singing
The first step you’ll want to take care of is to make yourself a makeshift “vocal booth” for the project. Capturing a quality vocal track can be very difficult if you’re already dealing with the color of the room.
Some engineers like to go crazy making a dedicated or portable vocal booth, but I’m a bit less particular. I just use several mic stands to surround the singer, and I hang fire blankets from the mic stands to create a sort of blanket fort around the vocalist.
From there, you’ll want to put your chosen microphone on a stand, with a pop filter, about 4-6” away from the vocalist, and you’re ready to get started.
As for the mic itself, dynamic and condenser microphones tend to work best for recording vocals. For years I used a Shure SM58 to record vocals. Occasionally, I’d switch over to the AT2035 for a less colorful sound. The sound of the vocalist will help point you in the right direction as to which mic is best for the job.
One Person Talking
Recording one person talking is a bit of an easier task, and you can usually do it without the help of the makeshift “vocal booth” I described above.
If you have a condenser mic handy, you’ll want to grab it for this project. A dynamic mic will also do the trick, but I find myself reaching for the AT2035 time and again when it comes to recording an interview or a narrator.
In this case, room noise is much more tolerable, and the color it provides can help make for a pleasant talking sound. Position your mic on axis from the subject, about 12” away. You can experiment further with mic placement to dial in an ideal sound for your project.
Podcast/More Than One Person Talking
Recording a podcast can be a bit more complex, since you’ll be dealing with more than one source of sound, and it will usually require more than one microphone as a result.
A popular method of recording podcasts is to provide each host with their own dynamic microphone. A super or hyper cardioid mic works very well for this since it will reject much of the sound coming from the other hosts.
But, you can also record a podcast using a single microphone, provided you’re only using two hosts for the podcasts. In this instance, a ribbon microphone tends to work very well, since it pulls in sound equally from the front and rear. That way, both hosts can come through the one microphone, crystal clear.
As for placement, position the mic about 6-8” from the host’s mouth, and be sure to add a pop filter to your set up. Setting the mic up slightly off-axis will also help to reduce pop noises. If you’re only using one mic, try positioning it equidistant between the two hosts.
How to Record a Singing Guitarist
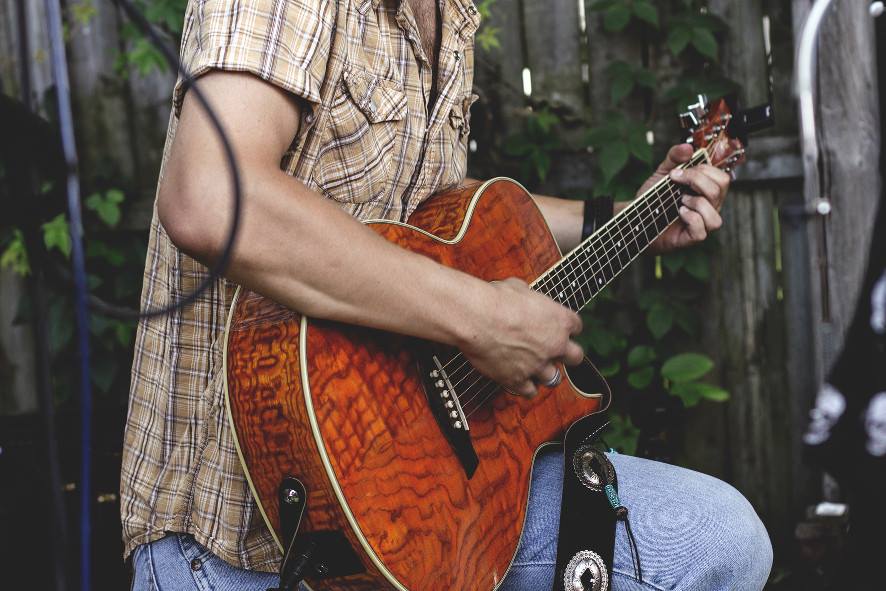
Many singer/songwriters give their most spirited performances when they’re singing and playing at the same time. For this reason, it’s often preferable to record both the guitar and vocals in a single take, instead of recording them separately.
Recording this configuration with one mic can prove to be very difficult. Often, you’ll be getting too much of the guitar and not enough of the voice and vice versa. But, experimenting with mic placement can make a world of difference, and it’s entirely possible to produce a quality recording with a single microphone.
I like to use the Zoom H2 for this process. I start by positioning the mic about halfway between the singer’s mouth and the guitar, about 2 feet away from them. Then, I experiment from there.
Ideally, you’ll record this setup with two separate tracks and two microphones. But, it can be difficult to avoid bleed from the voice or guitar. But, it’s certainly possible, and the method I’m about to explain has served me well.
I like to use a large diaphragm condenser for the guitar, and the Audio Technica AT2035 for the vocals.
I start by positioning the large diaphragm condenser about 3” from the body of the guitar, about halfway between the bridge and the edge of the guitar. The vocal mic gets positioned as any other vocal mic would. This configuration helps to limit bleed from the other instrument you’re recording.
If you have them at your disposal, you may want to experiment with trying a dynamic or ribbon mic to record the guitar.
How to Record an Entire Band at the Same Time
Recording an entire band at once presents plenty of unique challenges, and recording this way is a great teaching tool for aspiring engineers.
Recording a full band with a single mic will require a stereo mic, like the Zoom H2 we discussed above, or the Blue Yeti mic. If you don’t have a stereo mic at your disposal, using two condensers in an XY pattern works equally as well.
Start by positioning your mic overhead in the center of the room and go from there. Keep in mind that the room you’re recording in plays a key role in the sound you’re going to get. So, try to make sure you’re recording in a room that sounds great.
Also, keep in mind that a live recording will only sound as good as the band itself. You’re going to need to work closely with the band to ensure that every instrument is represented well on the recording.
How to Record for Film
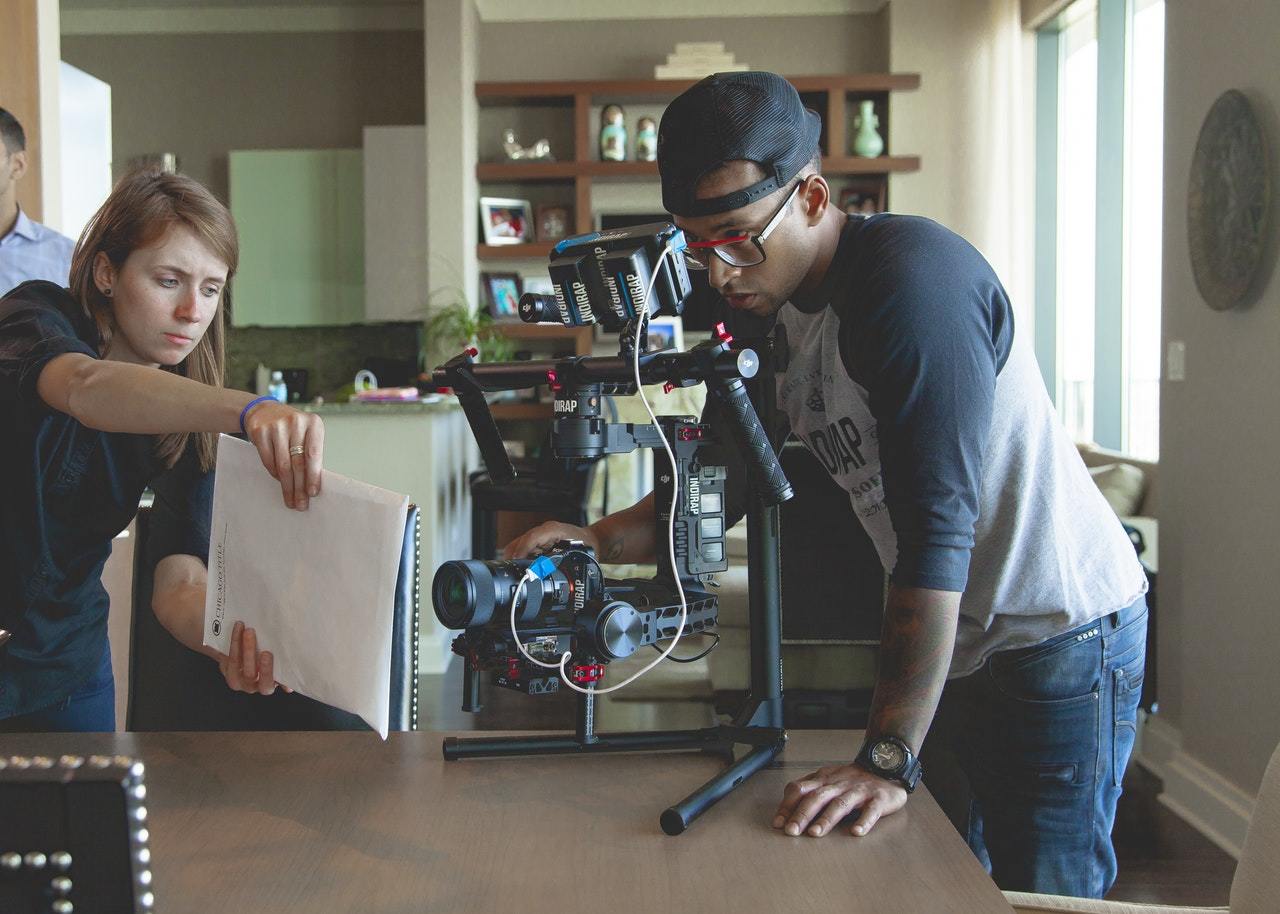
Thus far, we’ve covered many of the most important premises you’ll need to know to record music. But, what about film? Now, we’ll take a closer look at how to record the most important aspects of a film, like conversation, room-tone and sound effects.
Conversation
Recording conversation is perhaps the most critical aspect of recording for film, and it involves a bit of specialized equipment you may not already have from recording instruments.
To record dialogue, I rely on a pair of Rode NTG1 shotgun microphones set up on booms. The super-cardioid pattern of these mics is ideal for picking up dialogue while tuning out background noise. The result is crisp and clear dialogue that’s perfect for film.
This setup will set you back just over $200 for each microphone, so you may want to consider a more affordable solution like a mic mounted on-camera. These mics also do a great job of picking up dialogue but tend to provide much more color in the form of ambient noise.
It can also be very helpful to record dialogue using the cameras onboard microphone. Later, you can use that track to perfectly sync the audio you recorded with the shotgun mics, which is going to be what ends up in your film.
Room Tone
Recording room tone is a fairly straightforward process, and it can be critical to creating a balance between ambient noise and the important dialogue of the film. There are going to be times where you wish you had a bit more background noise you can add to your final mix to create a more natural feel within the film.
An omnidirectional mic is best for this type of recording. Capturing room tone can be as simple as placing your microphone in the center of the room and hitting record. All you should need is about 30-45 seconds of room tone, which you can manipulate to suit your needs during editing.
Foley / Sound Effects
Arguably the most fun you’ll have as an engineer, recording Foley, and sound effects is a great way to experiment with different mic placement and mic types to get the sound you’re looking for.
We’ll let you figure out the tools you’re going to use to create your foley track and focus instead on how to record them best.
I tend to stick to hyper-cardioid mics for recording Foley, like the AKG P170. That mic has served me well for virtually any kind of foley recordings I’ve done.
Where things get interesting is mic placement. You’ll need to focus on the particular scene and what it calls for to create the best foley recording for your film. Position the mic closer to the source for your close-up shots. If you’re recording a sound that should appear further away, position the microphone back from your source to capture that feeling of distance.
How to Record Nature

Recording nature presents its own unique set of challenges that are very different from the hurdles you can expect to run into inside the studio. Professional equipment specifically designed for recording nature can run into the several thousands of dollars, but we have some tips you can use today to produce quality nature recordings on a shoestring budget.
General Nature Sounds / Room Tone
For recording general nature sounds, we tend to employ the same tactics we’d use to record ambient room tone for film. Since recording outdoors generally means you won’t have access to all the studio equipment you’re used to, a mobile solution is necessary.
For recording nature, I reach for my Zoom H2 recorder. However, the Zoom H2N and H4N are much better suited for this task. I’m just too stubborn to replace my trusty H2 with a newer model.
These recorders capture great ambient sound on their own, and they can also be used with an external mic as well, which is what separates the H2 from the H2N. The H2 tends to produce a bit of additional noise when used with an external microphone, whereas the H2N does a better job of mitigating this noise.
Animals
Recording animals can be a bit more challenging since animals are usually even less cooperative than musicians are. It can be particularly difficult to isolate the sound of the animal from the ambient noise happening in the background. This explains why many wildlife documentarians rely on animal sounds that have been previously recorded.
If you’re hell-bent on recording your own animal sounds, you’ll want to employ a super or hyper-cardioid microphone, which will make it easier for you to isolate background noise from the unique call of the animal.
Since animals are rarely cooperative, you probably won’t be able to achieve ideal mic placement. Do your best to ensure you’re maintaining a safe distance from the animal, while also placing the microphone in such a way that the animal’s sound will be captured clearly.
Insects
Recording insect sounds can be even more difficult since the sounds generated by the insect are so quiet. For this purpose, it’s often better to rely on what you can find in a sound library since the equipment necessary to record insect noise is prohibitively expensive.
For insect recordings, you’ll need an extremely low-noise microphone, and probably a low-noise pre-amp as well if you’re going to have any chance at useful audio.
There are specialty microphones designed for this sort of work, but many of them cost upwards of $3000. The DPA D:screet 4060 series is one somewhat economical option you may wish to consider if you’re going to be doing a lot of insect recording, although that mic will still set you back about $400-$500.
