윈도우 XP 마이크 설정
윈도우 XP에서 마이크 설정하는 방법은 다음과 같습니다.
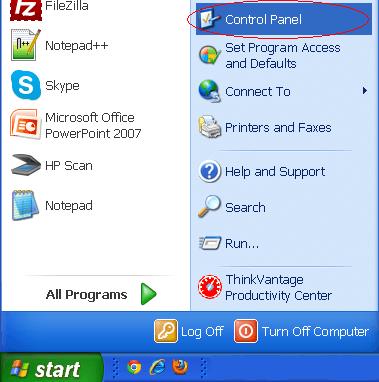
1단계: 윈도우 시작 메뉴에서 제어판을 클릭하세요.
![Control panel in the start menu](/wp-content/uploads/2019/10/control-panel-windows-xp.png)
2단계: “사운드, 음성 및 오디오 장치”를 클릭하세요.
![Clicking on Sounds, speech and audio devices](/wp-content/uploads/2019/10/audio-settings-windows-xp.png)
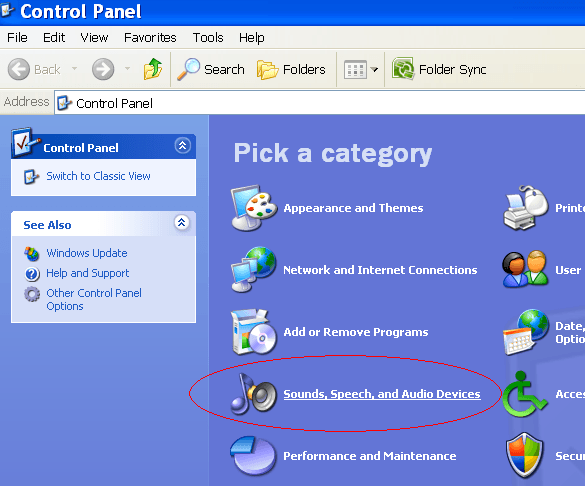
3단계: 사운드 및 오디오 장치를 클릭하세요.
![The Sounds and audio devices icon](/wp-content/uploads/2019/10/inner-audio-settings-windows-xp.png)
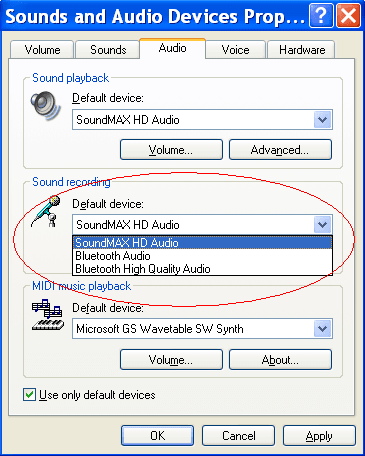
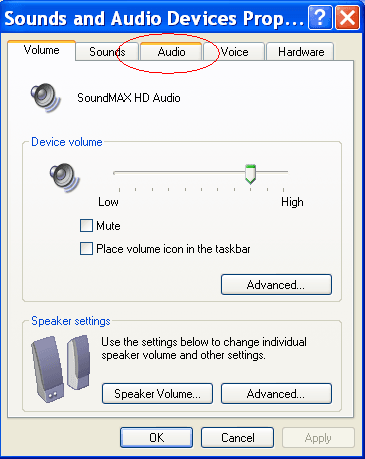
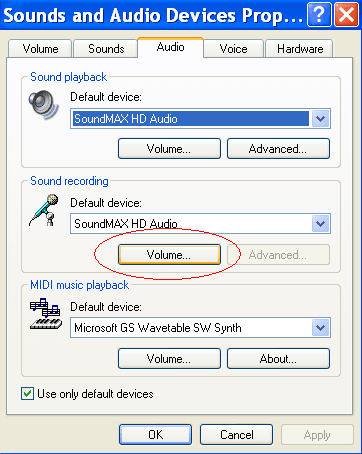
4단계: ‘오디오’ 탭을 클릭하세요.
![The audio tab on Windows XP](/wp-content/uploads/2019/10/audio-tab-windows-xp.png)
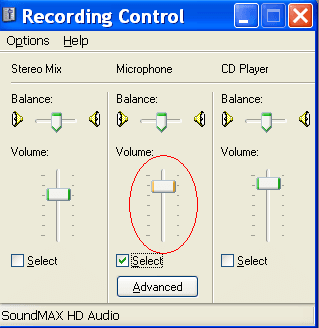
5단계: 사운드 녹음에서 ‘볼륨’을 클릭하세요.
![Audio tab in sounds and audio devices](/wp-content/uploads/2019/10/sound-recording-volume-windows-xp.png)
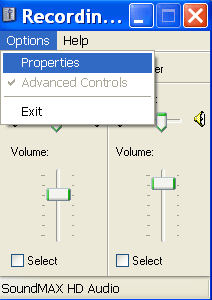
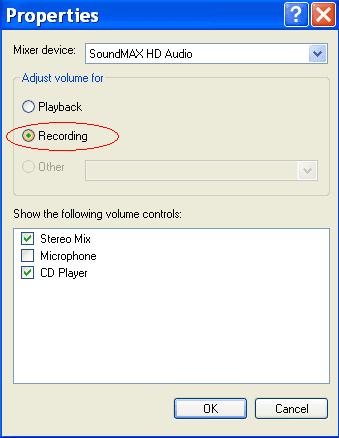
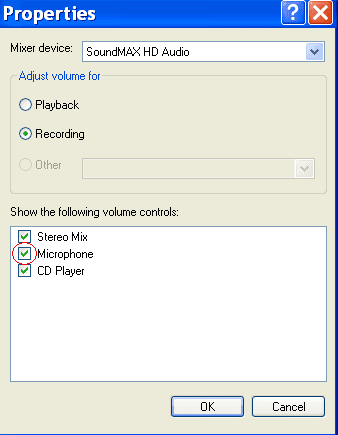
6단계: ‘마이크’에서 ‘선택’의 체크박스가 표시되게 하세요. ( 해당 창에서 ‘마이크’ 단어가 보이지 않는 경우 해야 할 일 ).
![The Volume button under Sound Recording](/wp-content/uploads/2019/10/microphone-selected-windows-xp-1.png)
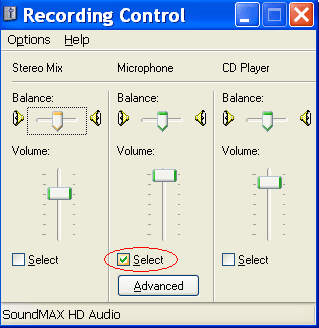
7단계: 같은 화면에서 마이크 볼륨이 올려져 있는지 확인하세요 (최대로 올리지 않아도 괜찮습니다. 물론 다치지는 않습니다).
![Making sure Select is checked in the microphone's settings](/wp-content/uploads/2019/10/microphone-volume-control-windows-xp.png)