
1: Here’s how to set the microphone settings in Windows XP
Step 1: Click on Control Panel in the Windows start menu.
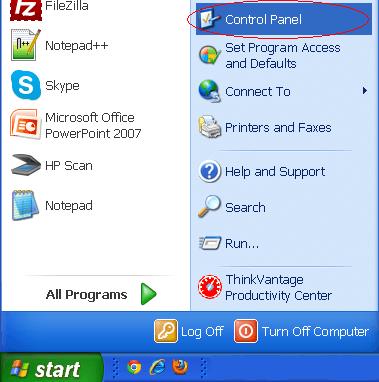
Step 2: Click on “Sounds, Speech and Audio Devices”.
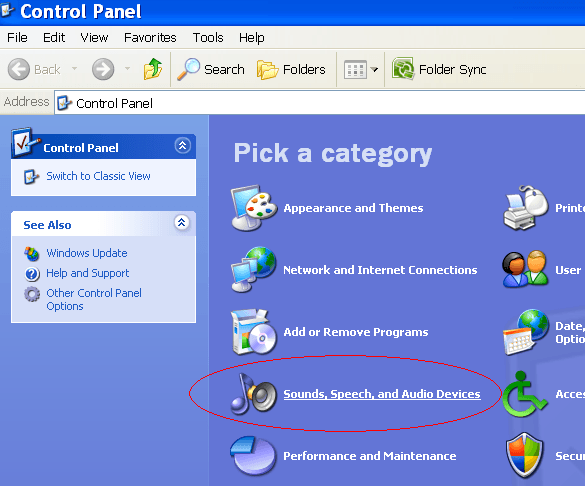
Step 3: Click on Sounds and Audio Devices.

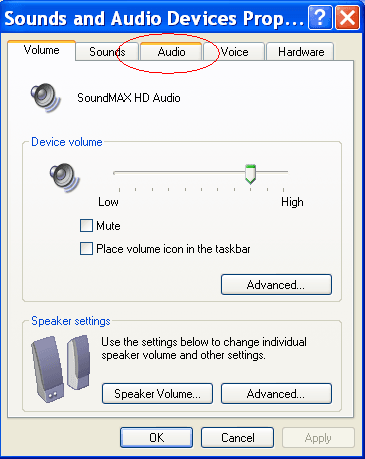
Step 4: Click on the ‘Audio’ tab.
Step 5: Under Sound recording click on ‘Volume’.
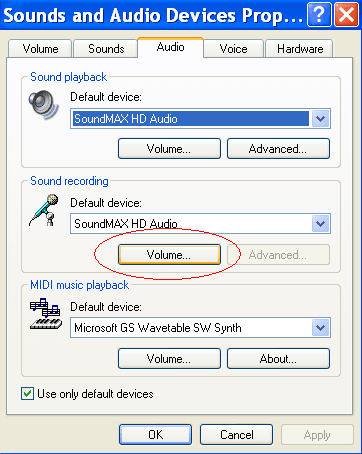
Step 6: Make sure that under ‘Microphone’ ’the checkbox ‘Select’ is checked. (What to do if you don’t see the word ‘Microphone’ in this window).
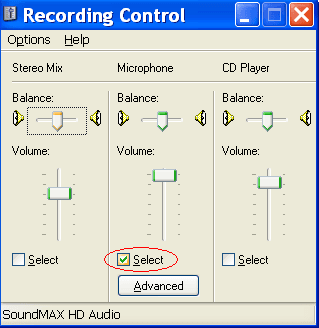
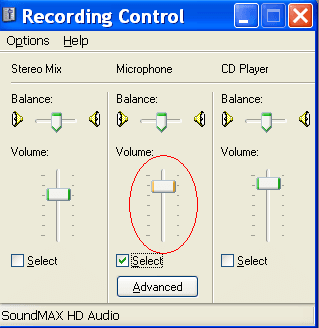
Step 7: In the same screen, check that the microphone volume is turned up (doesn’t have to be all the way, though it wouldn’t hurt).
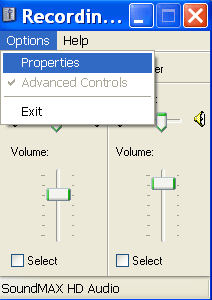
2: What to do If you don’t see the word ‘Microphone’ in the Volume menu
Step 1: Click on Options and from the menu that drops down choose Properties.
Step 2: Make sure that the ‘Recording’ option is the one that’s marked.
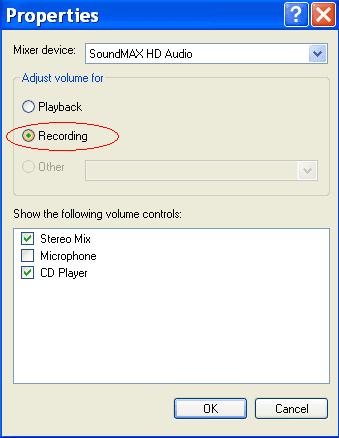
Step 3: Check (mark) ‘Microphone’.
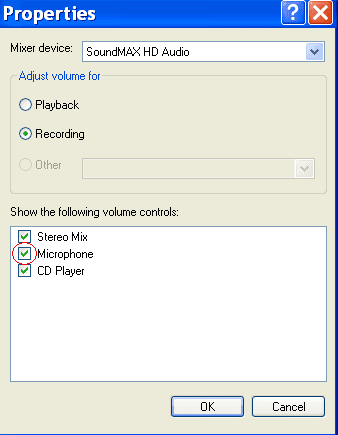
Click OK and then you will be brought back to the Volume options, where the Microphone options will now be visible.
3: What to do if your problem still isn’t solved
Step 1: Go back to the ‘Sounds and Audio Devices’ window, and to the ‘Audio’ tab in that window. (Repeat steps 1 to 4 in the first explanation to get there).
Step 2: Under the words ‘Default device:’ choose a different option from the menu that drops down (your options will likely be different from the screenshot here).
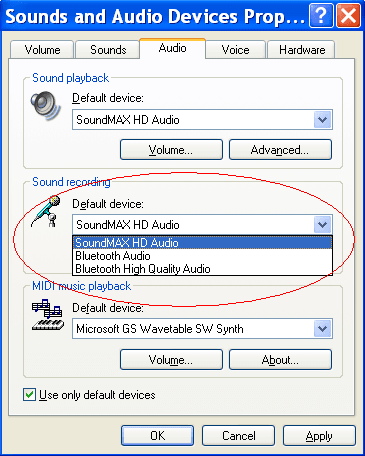
Step 3 : Click ‘Apply’
Step 4 : Check your microphone again using our microphone test or the Windows sound recorder.’
Step 5: If the microphone still isn’t working, repeat this explanation until all the different ‘Default device’ options are exhausted.
4: What to do if your problem STILL isn’t solved
If the problem still isn’t solved :
If all of that doesn’t work then I’m afraid that your Windows XP microphone settings aren’t the problem, and your microphone is probably faulty (broken).